Demystifying Computer Vision and Let’s Start Coding

With the increasing number of camera-equipped devices and various IoT devices out there, developers begin to realize that suddenly their playgrounds are not restricted to just web or desktop applications. Now it is a great time to get your feet wet and learn more about how computer vision can be programmed and what are the limitations.
There are two approaches to computer vision. One is that there are computer vision algorithms already developed and existed like the open source, OpenCV. Another is using the machine learning approach, where you supply thousands of photos to make the training model, and you can use it to do the image recognition or other processing. Nevertheless, image processing is always a processor intensive task. For OpenCV, it requires the processor to be an ARM-based processor and with enough RAM space to perform the work. So, developers can write their computer vision programs in the cloud server or the edge devices as long as the boards can run the embedded codes that they developed. Here are some boards that can support OpenCV: Raspberry Pi 3, Nvidia Jetson TX1 and TK1 for the hobbyists. The industrial level boards certainly can take the load as well. However, you cannot run OpenCV on Arduino board because the MCU (microcontroller) is not powerful enough and OpenCV does need some kinds of operating system sitting on top of the hardware to enable it to run.
In this article, we are going to show using C++, .NET, and cloud to develop our computer vision solutions. By the way, OpenCV is not limited to these programming languages, and there are Python, Java, JavaScript programming libraries available and extended support for Android and iOS as well. To learn more about other options, you can visit: https://opencv.org/platforms/
We will be using Microsoft Visual Studio 2017 Community edition to show the C++ and .NET examples.
In the C++ project, we use the OpenCV source directly to build our solution, and the .NET example is using Emgu, CV, a .NET wrapper for OpenCV library that contains 2,500 algorithms. In our demonstration, we use version 3, and please remember that there are many differences between version 2 and 3 since many functions are different and many functions do not exist in version 3. Like any wrappers, its performance cannot compare to the original ones. It may not contain the latest and greatest. However, the wrapper Emgu is much easier to use since we can use C#, and you know it’s much harder to debug in C++ environment than in C#.
Moreover, Emgu wrapper can be used as a development phase tool, and when it’s time to pour the final phase, we can use the C++ project to use the OpenCV directly. It also depended on the complexity of your project. If it’s less complicated, then you can use the Emgu. However, if it’s a lot complex, you should go straight for the OpenCV C++ route. Let’s try both now!
Setup OpenCV in Visual Studio 2017 - Method 1: Using C++ Project to use OpenCV
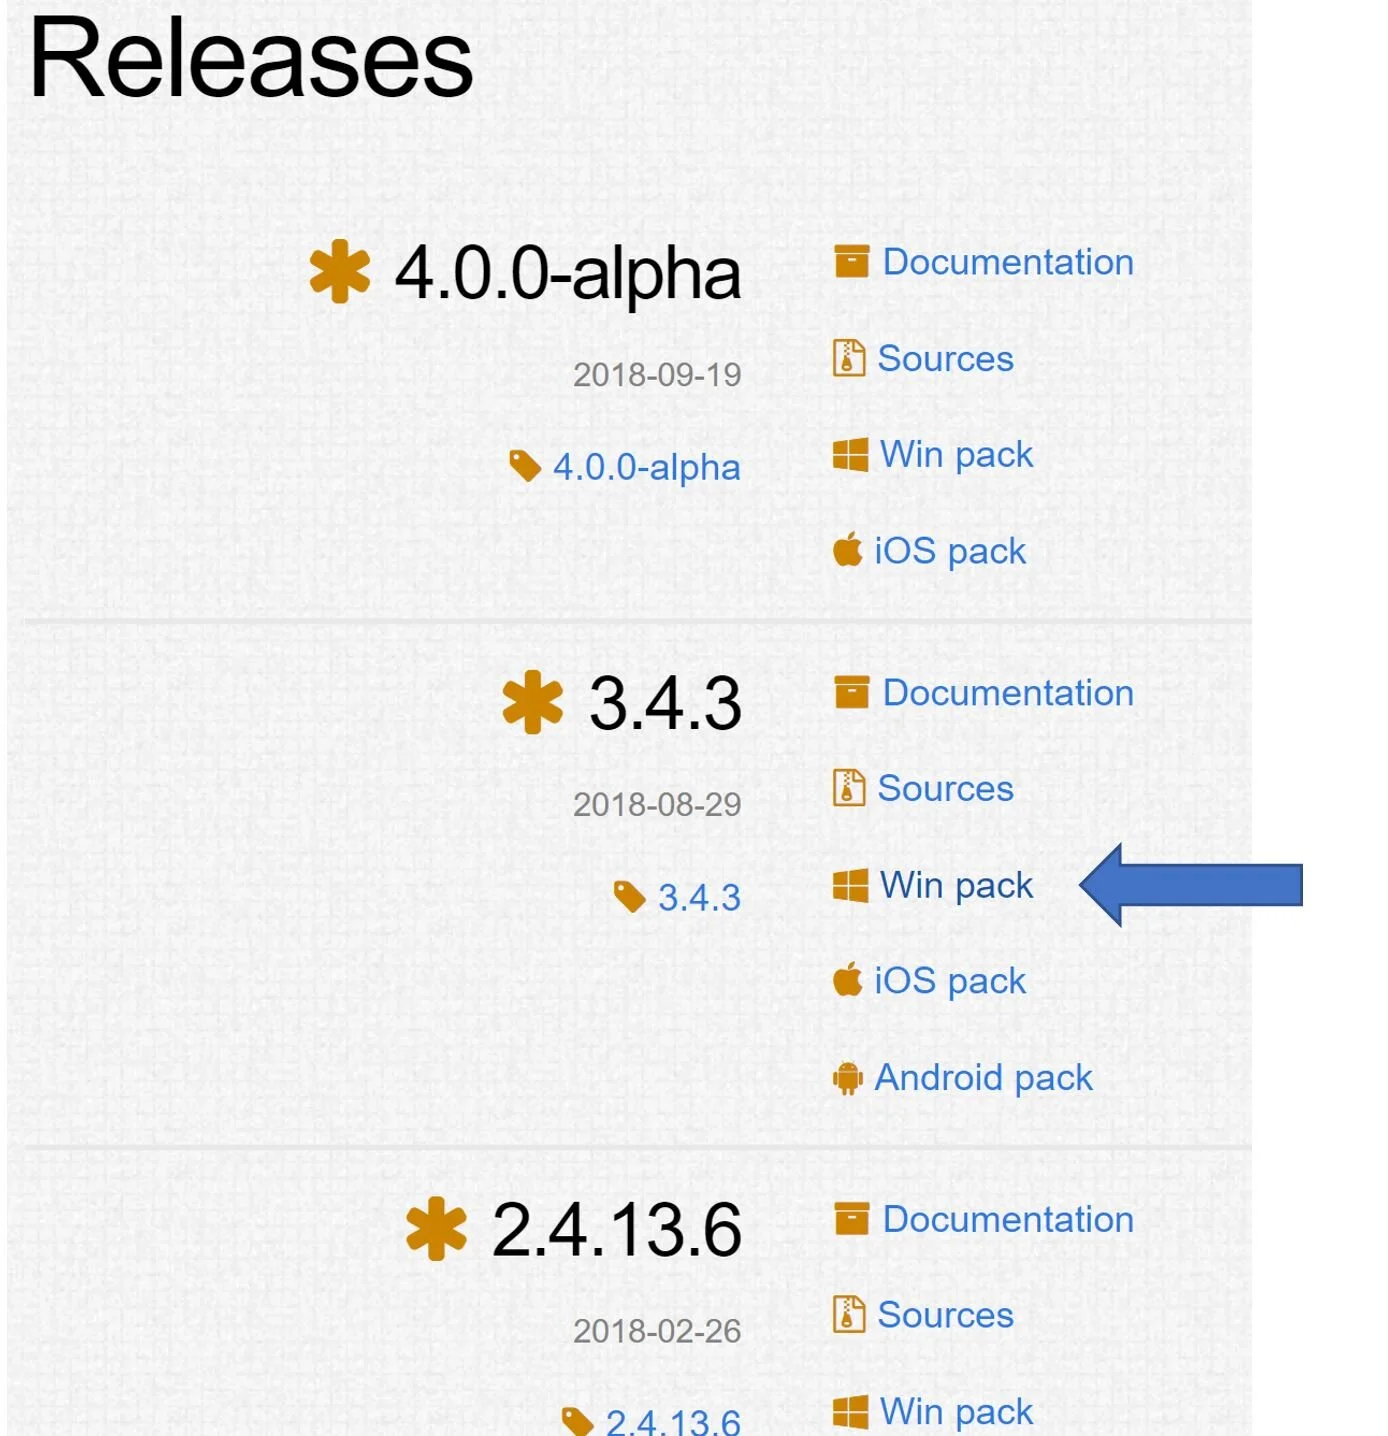
1. Go to https://opencv.org/releases.html
2. Select “Win pack” from the latest version.
In my case, it’s 3.4.x. Click on the Win pack to download opencv-3.4.2-vc14_vc15.exe
3. Create a folder in C:\ drive
C:\Emgu\
4. Double click on the opencv-3.4.2-vc14_vc15.exe to install. You can install in this folder: C:\Emgu\ or C:\OpenCV\ and when it’s done you should see folder structures as shown here.

5. For Visual Studio to build the OpenCV project, you need to map your PC to the build folder that you just downloaded.
System’s properties à Select Advanced system settings à Click on the “Environment Variables” button à Select on “PATH” à Click on Edit

Add new path: C:\Emgu\OpenCV\build\x64\vc15\bin
6, Open Visual Studio 2017, create a new project à Select Visual C++, Empty Project

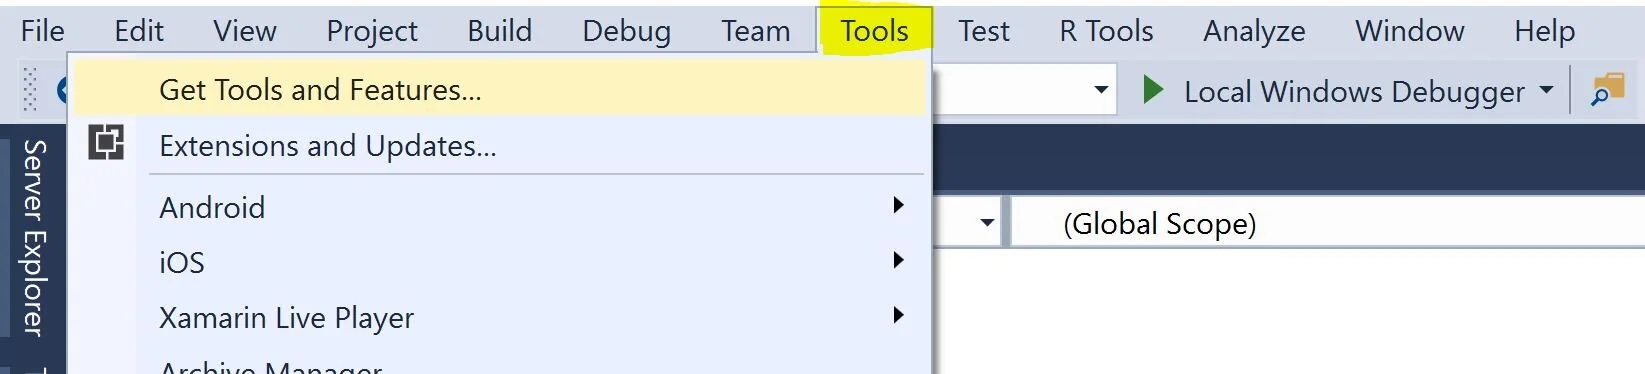
If you do not see this option as shown above, you need to use Visual Studio Installer to install the project templates by going to Tools à Get Tools and Features à Desktop development with C++
7. Set additional properties for the projects. In this step, we are going to set properties for different modes: DEBUG and RELEASE. The steps are similar in these two modes, but watch out for the differences.
Go to Property Page: Right-click on the project name and select “Properties” from the submenu in the Solution Explorer
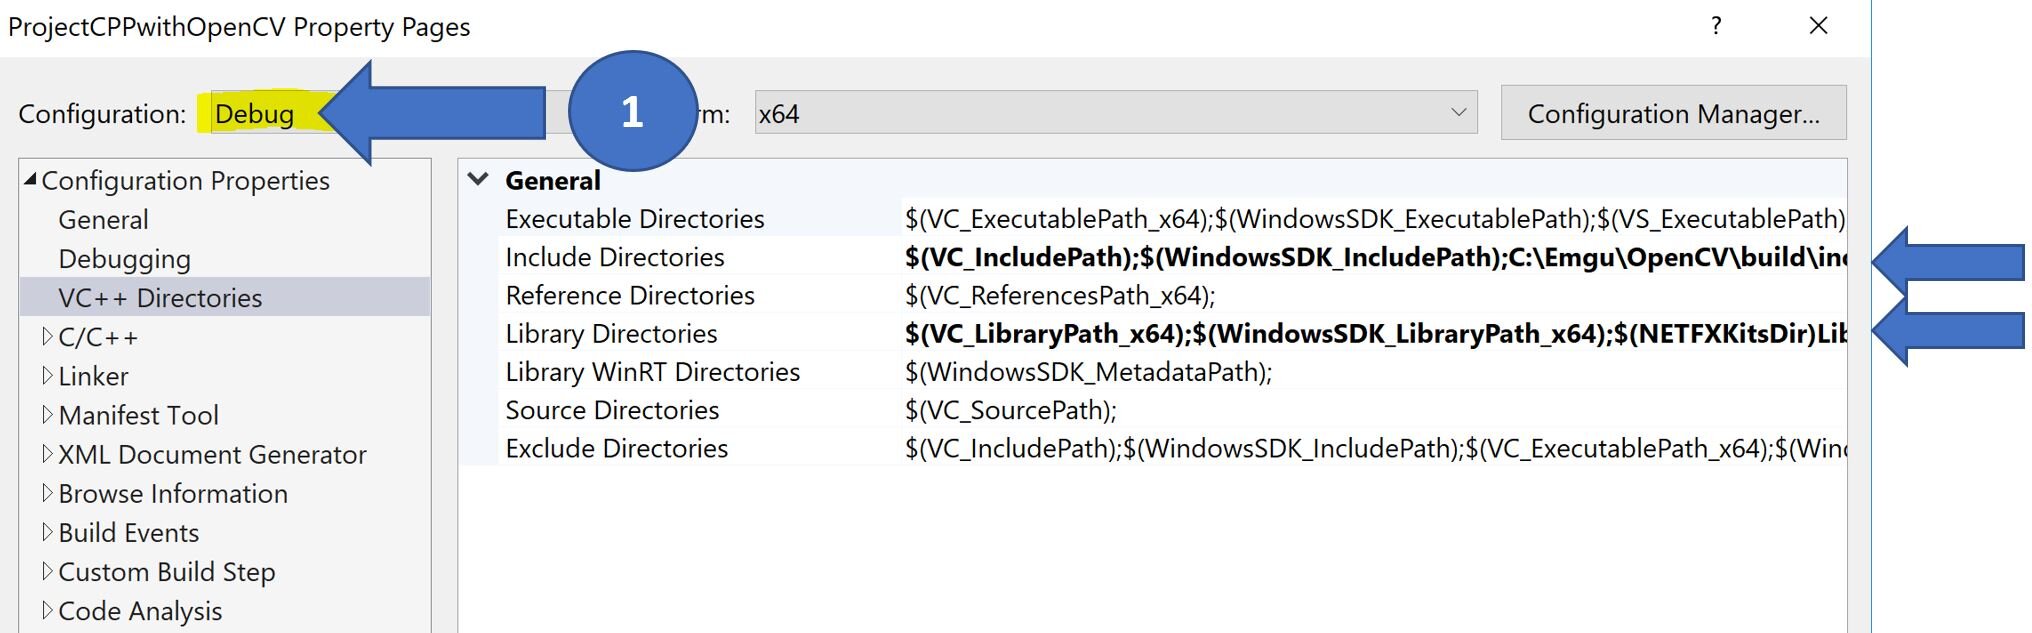
1. Select “Debug” in the Configuration list box
2. Select the VC++ Directories from the left
Here you are going to update 2 things:
Include Directories: C:\Emgu\OpenCV\build\include\opencv;C:\Emgu\OpenCV\build\include\opencv2;
Library Directories: C:\Emgu\OpenCV\build\x64\vc15\lib;
3. Select the Linker from the left -- > Input --> Additional Dependencies textbox
Enter: opencv_world342d.lib or your version found here [See below]
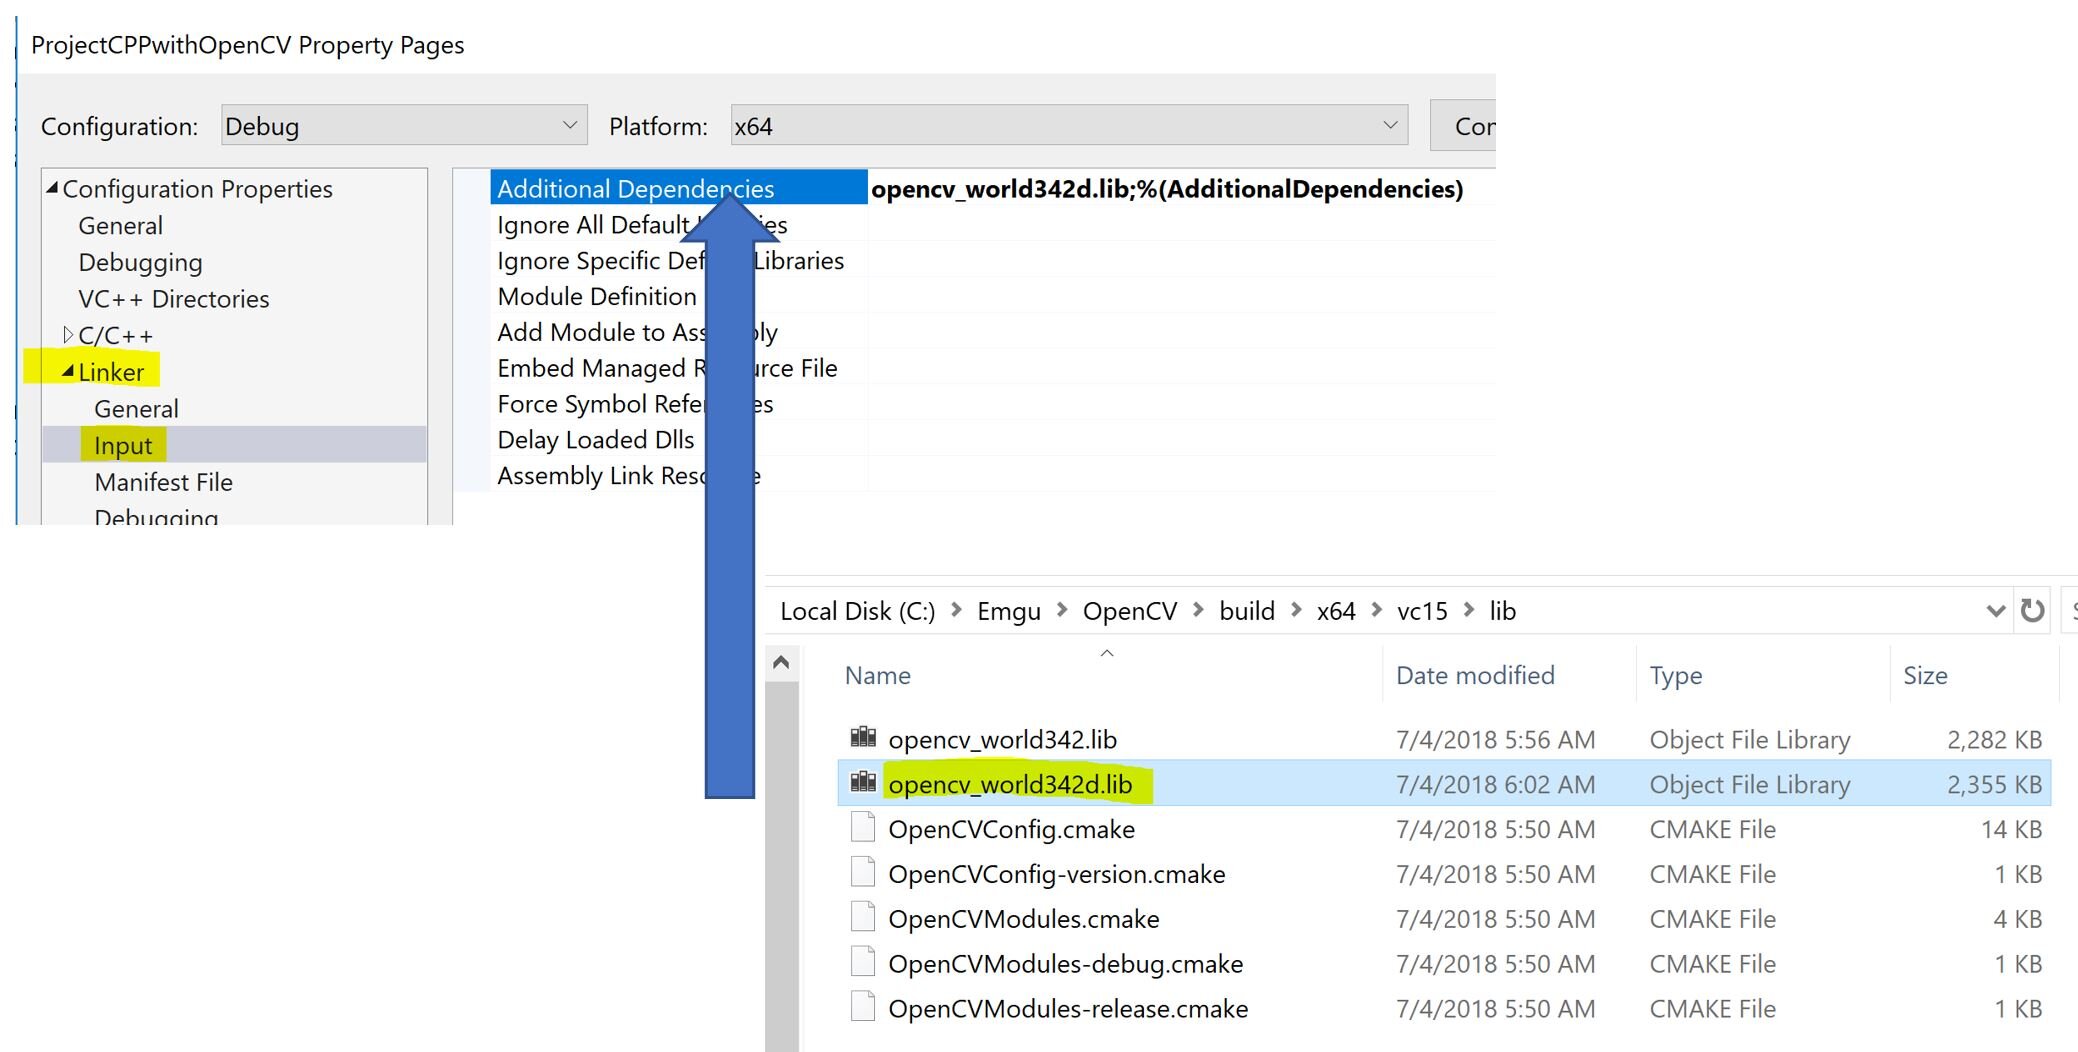
In this step, make sure you type the letter “d” at the end as in opencv_world342d.lib
4. In this step, it is similar to the first step, except, this time you’re going to select “Release” in the Configuration list box
5. Select the VC++ Directories from the left
Here you are going to update 2 things:
Include Directories: C:\Emgu\OpenCV\build\include\opencv;C:\Emgu\OpenCV\build\include\opencv2;
Library Directories: C:\Emgu\OpenCV\build\x64\vc15\lib;
6. Select the Linker from the left -- > Input --> Additional Dependencies textbox
Enter: opencv_world342.lib or your version found here

In this step, make sure you do not have the letter “d” at the end as in opencv_world342.lib
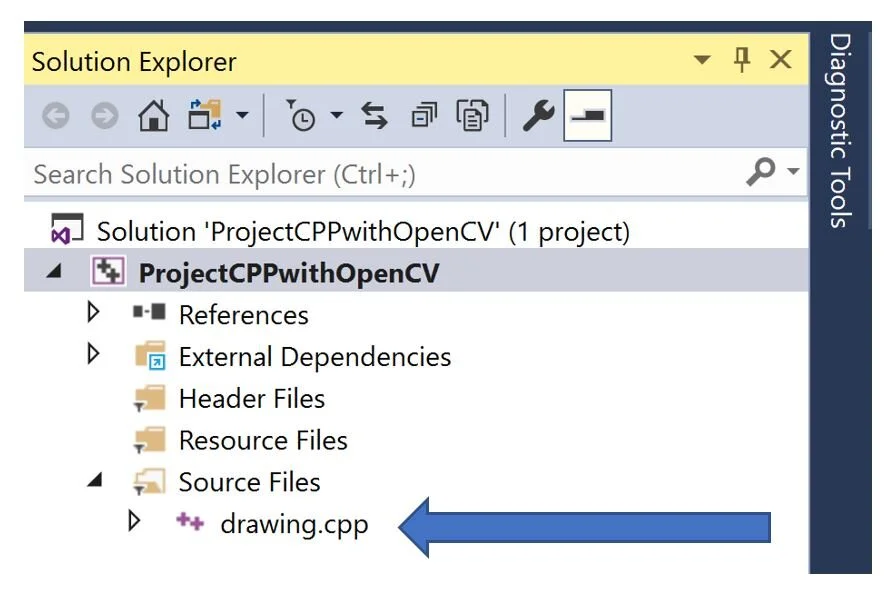
8. Now it’s time to do a test drive and have fun. Copy the file from C:\Emgu\OpenCV\sources\samples\cpp\drawing.cpp and put it under the Source Files folder
9. Click on run either in Debug or Release mode. Please note you may need to wait for a few seconds before seeing anything coming up for the first time or if you have a slower machine.

Setup OpenCV in Visual Studio 2017 - Method 2: Using .Net wrapper to use OpenCV
Emgu CV is a cross platform .Net wrapper for OpenCV
1. Go to https://sourceforge.net/projects/emgucv/
2. Go to https://sourceforge.net/projects/emgucv/files/emgucv/
3. Select the latest version, in my case, it’s 3.4.1, and choose either the .exe or .zip file

4. Click on it to install, and extract the files to C:\Emgu\emgucv-windesktop 3.4.1.2976
5. Click on the solution files located in C:\Emgu\emgucv-windesktop 3.4.1.2976\Solution\Windows.Desktop\Emgu.CV.Example.sln
6. Click on FeatureMatching Project and right-click on it, and select “Set as Startup project”
7. Click on run and you should see the image has been identified.

Machine Learning Approach to the Computer Vision Solution
As mentioned earlier, besides using the open source solution like the OpenCV library in your local pc, the machine learning approach is becoming more mature and robust since it is straightforward to implement, and it can create your custom model using your uploaded images. We recommend you read our article: Exploring the Custom Vision Service from the Cloud to learn more about this approach in identifying the image through machine learning.